


Constructing a door upstand is a practical and aesthetically pleasing project that enhances the functionality of any door frame. A door upstand acts as a raised feature at the bottom of a door frame, serving various purposes such as moisture protection, aesthetic improvement, and prevention of drafts. Whether you’re a professional carpenter or a DIY enthusiast, understanding how to construct a door upstand is essential for achieving a polished look and adding practical benefits to your home. In this article, we will guide you through the process of a door upstand, from planning and measuring to the final finishing touches.
What is a Constructing a door upstand?
A door upstand is a raised area placed along the bottom of a door frame. It is typically a narrow strip of material, such as timber or MDF (Medium Density Fiberboard), that runs horizontally across the door frame, rising slightly from the floor. The upstand serves multiple purposes, from improving the overall look of the door frame to providing protection from water and dirt infiltration.
There are several reasons why constructing a door upstand is beneficial:
- Moisture Protection: A door upstand helps prevent water from entering the door frame, especially in areas prone to dampness or heavy rainfall.
- Aesthetic Appeal: A well-constructed door upstand can add a clean and finished appearance to the bottom of a door frame.
- Draft Prevention: A door upstand can help block drafts, keeping the room more comfortable and reducing energy costs.
Now that we understand what a door upstand is, let’s dive into the step-by-step process of constructing one.
Materials Needed for Constructing a Door Upstand
Before starting, gather all the necessary materials for constructing a door upstand. Using the right materials will ensure that the upstand is both functional and visually appealing.
- Timber or MDF: Choose the material based on your preferences and needs. Timber offers a natural, sturdy finish, while MDF provides a smooth surface that’s easy to paint.
- Screws or Nails: To secure the upstand to the door frame.
- Wood Glue: For additional stability when attaching the upstand.
- Measuring Tape: To ensure precise measurements for cutting the upstand.
- Saw: To cut the timber or MDF to size.
- Drill: For creating holes for screws and nails.
- Spirit Level: To ensure the upstand is installed level with the door frame.
- Sandpaper: For smoothing edges and ensuring a neat finish.
- Paint or Varnish: To protect the upstand and enhance its appearance.
- Trim or Molding (optional): For decorative purposes around the upstand.
Step 1: Measure the Door Frame
The first step in constructing a door upstand is to take accurate measurements of the door frame. Proper measurements will help ensure that the upstand fits perfectly and serves its intended purpose.
1.1 Measure the Width of the Door Frame
Using a measuring tape, measure the bottom width of the door frame where you want to install the upstand. This measurement will help you determine how long the upstand needs to be.
1.2 Measure the Height of the Upstand
The height of the upstand depends on your aesthetic and functional goals. Typically, door upstands range from 2 to 4 inches in height. For functional purposes, taller upstands are often used to prevent water or drafts from entering, while shorter upstands are more aesthetically focused.
1.3 Measure the Floor Clearance
Measure the distance between the floor and the bottom of the door frame. This will help you decide how much clearance the door has above the floor and ensure that the upstand will not obstruct the door’s movement.
Step 2: Cut the Materials to Size
Once you have your measurements, it’s time to cut the materials for the upstand. Follow these steps to ensure the cuts are accurate and clean.
2.1 Cut the Length of the Upstand
Using a saw, cut the timber or MDF to the length of the door frame’s bottom width.
2.2 Cut the Height of the Upstand
If your upstand needs to be a specific height, measure and mark the desired height on your timber or MDF. Use a straight edge or a mitre box to ensure that the cut is even and straight.
2.3 Smooth the Edges
After cutting, sand down any rough edges on the upstand using sandpaper. This will ensure a clean finish and help avoid any sharp edges that could cause injury.
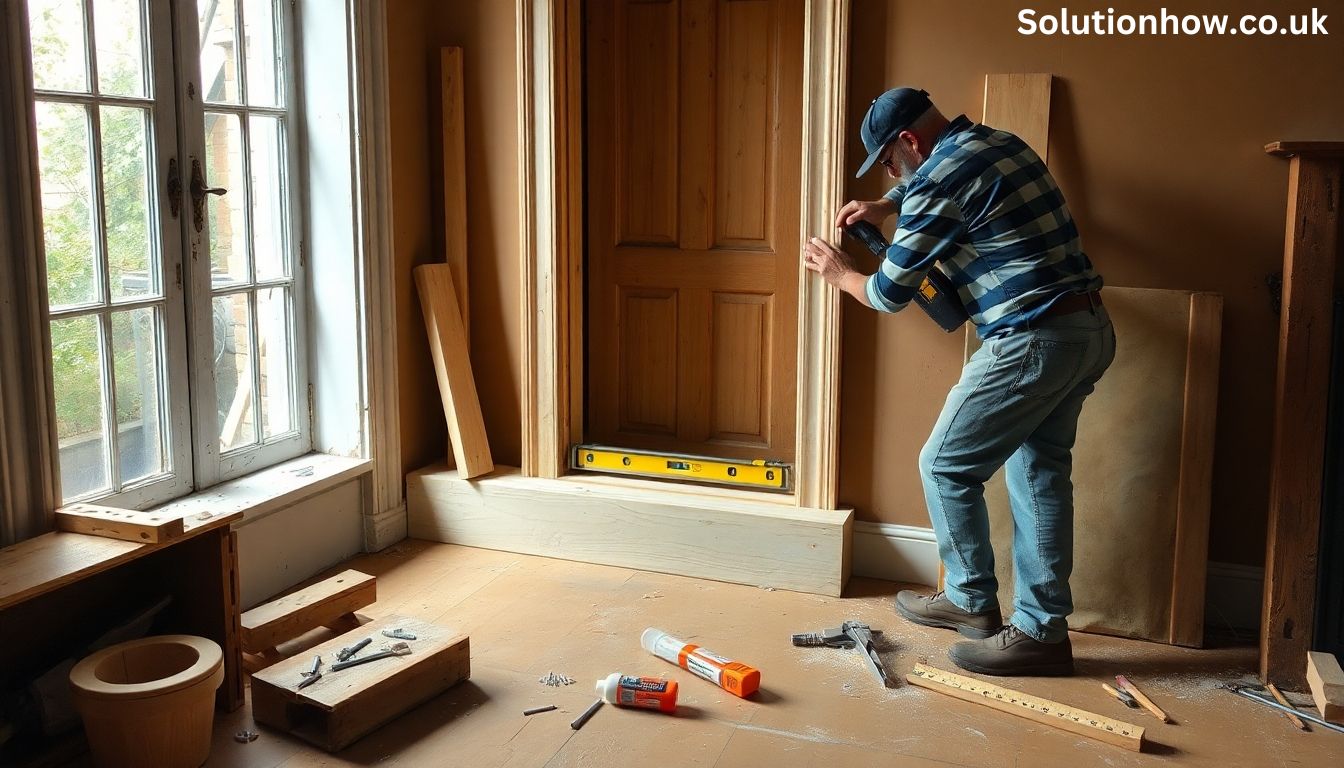
Step 3: Attach the Upstand to the Door Frame
With your materials cut and prepared, it’s time to attach the upstand to the Constructing a door upstand frame. Follow these steps to securely fix the upstand in place.
3.1 Apply Wood Glue
Start by applying a thin layer of wood glue to the back of the upstand. This will help keep the upstand in place and provide additional stability.
3.2 Position the Upstand
Place the upstand at the bottom of the door frame, ensuring it is level and properly aligned with the edges of the frame. Use a spirit level to check that the upstand is perfectly horizontal.
3.3 Secure the Upstand
Once the upstand is in position, use screws or nails to secure it to the door frame. Alternatively, you can use nails, hammering them in at regular intervals to ensure the upstand is securely attached.
Step 4: Add Trim or Molding (Optional)

For a more refined and polished look, you may want to add trim or molding around the upstand. This step is entirely optional, but it can enhance the overall appearance of the door frame.
4.1 Choose Decorative Trim or Molding
Select trim or molding that complements the style of your room or door. You can opt for simple skirting boards or more intricate molding, depending on your preference.
4.2 Attach the Trim
Using nails or screws, attach the trim or molding around the edges of the upstand. Ensure the trim is flush with the surface of the upstand and door frame for a seamless appearance.
Step 5: Finish the Upstand
Now that the upstand is securely attached, it’s time to finish it for durability and visual appeal.
5.1 Sand the Edges
If necessary, sand any areas where the upstand meets the door frame to ensure smooth, even edges. This will also help to remove any excess glue or paint.
5.2 Paint or Varnish
To protect the upstand from wear and tear, apply a coat of paint or varnish. Choose a paint color that complements your door frame and room décor. If you used MDF, ensure the surface is smooth before painting.
5.3 Final Check
Once the upstand is painted and dried, check that everything is aligned correctly. Ensure that the door can still open and close without obstruction from the upstand.
Also Read: Meet the Press S76E46
Benefits of Constructing a Door Upstand
Constructing a door upstand has several practical benefits. Here are some of the main advantages:
- Moisture Protection: By creating a barrier between the floor and the door frame, a door upstand helps prevent water from entering the door frame, especially in areas with heavy rainfall or high humidity.
- Enhanced Aesthetics: A well-designed upstand adds a finished, polished look to the bottom of your door frame, improving the overall appearance of your door.
- Prevents Drafts: A door upstand can help reduce drafts, particularly in older buildings with gaps at the bottom of the door frame.
- Improved Cleanliness: The upstand helps prevent dust and dirt from accumulating at the bottom of the door frame, keeping your home cleaner.
Conclusion
Constructing a door upstand is a simple yet effective way to improve the functionality and appearance of your door frame. By following the steps outlined in this guide, you can create a professional-looking upstand that provides moisture protection, enhances the aesthetic of the door, and prevents drafts. Whether you are working on an exterior or interior door, constructing a door is a great way to add both style and practicality to your home. With the right materials and a little attention to detail, you can easily create an upstand that will serve you for years to come.